
Embroidery adds a touch of intricate beauty to any piece of jewelry, and when incorporated into a necklace, it creates a stunning and unique accessory. Whether you’re a seasoned crafter or just starting out, here’s a comprehensive guide on how to put embroidery in a necklace, along with the necessary materials and detailed instructions.
Contents
Materials Needed
Embroidery Hoop: Choose a hoop size appropriate for your design.
Embroidery Needle: Select a needle with a sharp point and large eye for threading embroidery floss.
Embroidery Floss: Pick your desired colors for the embroidery design.
Fabric: Use a sturdy fabric like cotton or linen that can hold the embroidery stitches.
Necklace Base: This could be a pre-made necklace chain or cord, or you can create your own using jewelry-making supplies.
Scissors: Sharp scissors are essential for cutting the embroidery floss and fabric.
Embroidery Pattern: You can either create your own design or use a pre-existing pattern.
Step-by-Step Instructions
1. Prepare Your Workspace
Set up a clean, well-lit workspace with ample room to maneuver your materials.
Place your embroidery hoop on a flat surface.
2. Transfer Your Design
If using a pre-existing pattern, transfer it onto your fabric using a transfer pencil or by tracing with a water-soluble pen.
If creating your own design, sketch it directly onto the fabric using a pencil.
3. Secure the Fabric in the Hoop
Loosen the screw on the embroidery hoop and separate the inner and outer rings.
Place your fabric over the inner hoop, ensuring the design is centered.
Fit the outer hoop over the fabric and inner hoop, then tighten the screw to secure the fabric in place.
4. Thread the Needle
Cut a length of embroidery floss, typically around 18-24 inches.
Separate out one or two strands of floss, depending on the thickness desired for your stitches.
Thread the floss through the eye of the embroidery needle and tie a knot at the end.
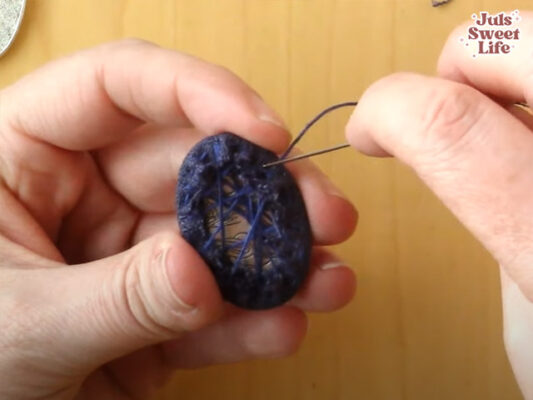
5. Begin Embroidering
Start stitching your design according to your chosen pattern.
Common embroidery stitches used in necklace designs include backstitch, satin stitch, French knots, and chain stitch.
Take care to keep your stitches neat and even, especially if your design includes intricate details.
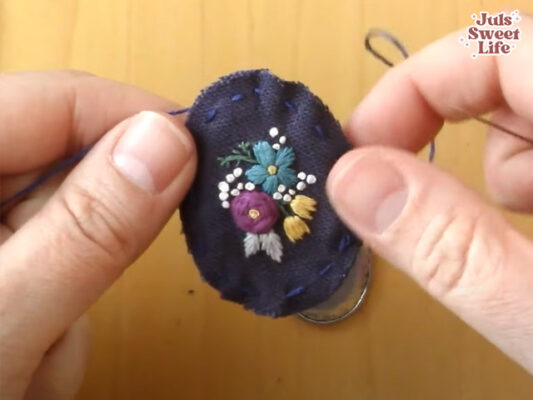
6. Complete Your Embroidery
Continue embroidering until your design is complete, taking breaks as needed to rest your hands and eyes.
Once finished, carefully trim any excess fabric around the hoop, leaving a small border.
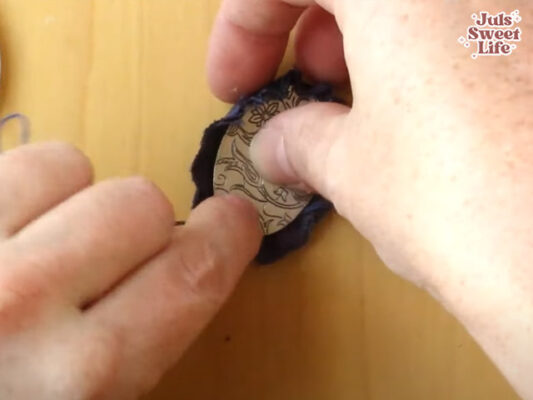
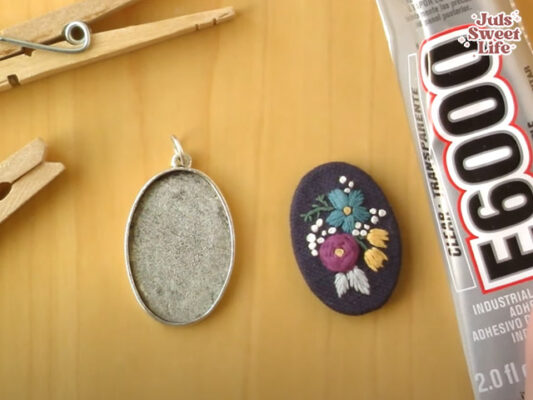
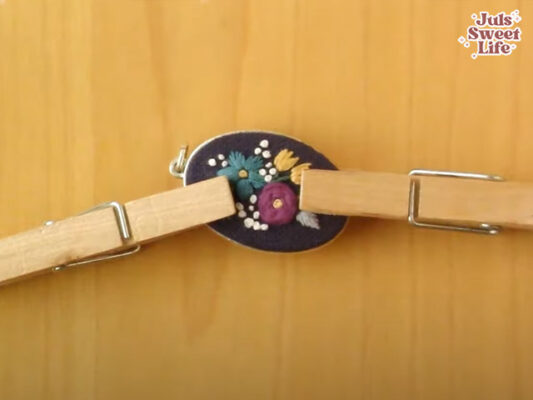
7. Attach the Necklace Base
Determine where you want to attach the necklace base to your embroidered design.
If using a pre-made necklace chain or cord, you can simply attach it using jump rings or a clasp.
If creating your own necklace base, use jewelry-making techniques such as wire wrapping or beadwork to secure it to the embroidery.
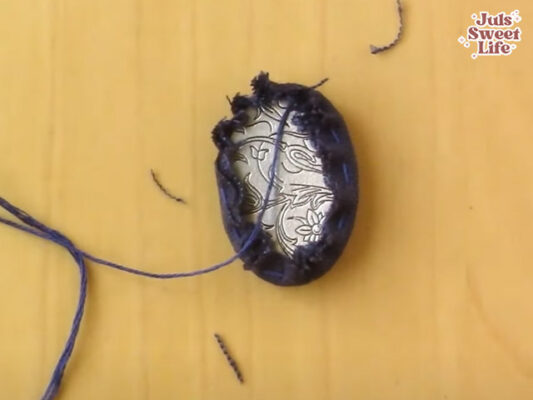
8. Finishing Touches
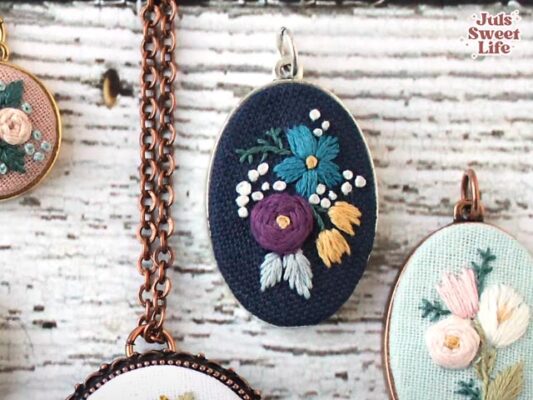
Inspect your necklace for any loose threads or imperfections, and make any necessary adjustments.
Optionally, you can add embellishments such as beads or sequins to enhance your design further.
Once satisfied with your necklace, it’s ready to wear or gift to someone special!
By following these step-by-step instructions, you can create a stunning embroidered necklace that showcases your creativity and craftsmanship. Experiment with different embroidery techniques and designs to make each necklace a one-of-a-kind piece of wearable art.
Thank you for reading through this guide on incorporating embroidery into a necklace. I hope you found it helpful and feel inspired to experiment and create with this embroidery technique. If you have any questions or feedback, please don’t hesitate to share with us. Wishing you the best of luck in crafting beautiful and unique embroidered jewelry pieces!
Related Posts
- 10 Easy Tips to Improve Your Drawing Skills
- Discovering Free Fonts for Commercial Use
- Best 10 Outdoor Fonts for Nature-friendly Projects